


There’s nothing quite like stepping into a warm, soothing sauna after a long day or intense workout. But what if you could experience the luxurious benefits of a sauna right in your own backyard? A portable woodfired sauna provides the perfect solution for Aussies looking to bring relaxation, wellness, and a touch of luxury into their outdoor space. Whether you’re living in the city, on a rural property, or somewhere in between, creating a backyard sauna experience has never been easier. Let’s walk through everything you need to know to set up your own portable woodfired sauna.
1. Why Choose a Portable Woodfired Sauna?
Before diving into the setup, it’s important to understand the unique benefits of a woodfired sauna. Unlike traditional electric saunas, which rely on artificial heating, a woodfired sauna uses natural fire and stones to create authentic heat. The crackling fire, the aroma of burning wood, and the radiant warmth from the stones create an atmosphere of relaxation that can’t be matched by electric saunas. These saunas also tend to be more energy-efficient, using renewable resources like firewood, making them a sustainable option for wellness.
2. Choosing the Right Location for Your Backyard Sauna
The first step in setting up your portable woodfired sauna is selecting the ideal location. Here are a few things to consider:
-
Flat and Stable Ground: The sauna needs to sit on a level, stable surface to ensure it is safe and functional. Look for a spot in your yard that’s even and away from any areas where water might collect.
-
Ventilation: A woodfired sauna produces smoke and heat, so it’s crucial to place it in a well-ventilated area. Ideally, the sauna should be set up a safe distance from flammable structures, trees, or bushes.
-
Proximity to Water: Having easy access to water is important for safety, especially for cooling down after your sauna session or when you need to pour water onto the sauna stones to create steam.
-
Privacy and Relaxation: Your sauna should be in a quiet area where you can enjoy your sessions without disturbance. A spot surrounded by greenery or near a tranquil outdoor setting like a garden or pool would be ideal.
3. Preparing the Ground and Foundation
Depending on the type of portable woodfired sauna you’ve chosen, you may need to prepare the ground for the sauna to rest on. Some portable saunas are designed to be placed directly on the earth, while others may require a foundation such as gravel, paving stones, or even a wooden deck to ensure stability.
If you’re setting it up on grass or dirt, consider laying down a durable tarp or heavy-duty mat underneath to protect the bottom of the sauna and prevent any moisture or debris from entering.
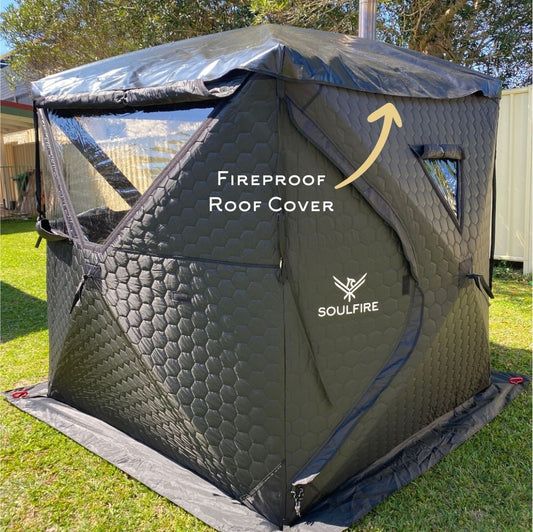
4. Assembling Your Portable Woodfired Sauna
One of the greatest advantages of a portable woodfired sauna is its easy assembly and disassembly. Most models are designed to be user-friendly, with detailed instructions on how to set up the sauna. While it’s typically a straightforward process, here are some general steps:
-
Unbox the Sauna: Lay out all the pieces and make sure everything is accounted for. Most saunas come in pre-cut panels or sections that easily fit together, like a puzzle.
-
Assemble the Frame: Begin by assembling the frame or base of the sauna. Ensure all parts are tightly secured to provide a solid structure.
-
Install the Stove: The woodfired stove is the heart of the sauna, and it needs to be positioned correctly. Follow the manufacturer’s guidelines to safely install the stove in the designated area, ensuring proper ventilation.
-
Place the Rocks: Once the stove is installed, add the igneous sauna stones to the stove. These stones hold the heat and release it gradually, creating the authentic sauna experience.
-
Install the Door and Windows: Most portable saunas come with clear windows and a door to allow for easy access and natural light. Install these components as instructed.
5. Firing Up Your Woodfired Sauna
Once your sauna is assembled and in place, it’s time to fire up your woodfired stove. Here’s how to do it safely and efficiently:
-
Start the Fire: Use dry, seasoned wood to start the fire. Light the kindling, and gradually add larger pieces of wood. Let the fire establish itself and begin to heat up the stones.
-
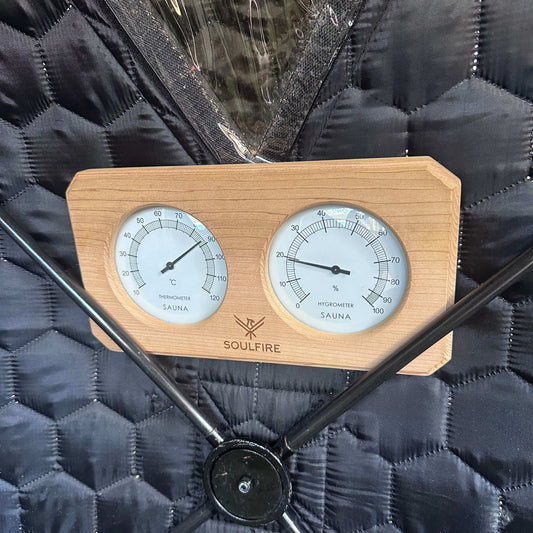
Monitor the Temperature: While the sauna may not heat up immediately, give it time to reach the desired temperature (usually between 70°C and 90°C). Always make sure the fire is controlled and doesn’t get out of hand. You can add wood periodically to maintain the heat.
-
Create Steam: For added relaxation, you can pour water onto the hot stones to create steam. This increases the humidity inside the sauna and intensifies the heat, giving you that authentic sauna experience.
6. Sauna Safety Tips
While woodfired saunas are safe when used properly, it’s important to follow some key safety guidelines:
-
Monitor the Fire: Always keep an eye on the fire while it’s burning to ensure it doesn’t spread. Never leave the sauna unattended when the fire is lit.
-
Proper Ventilation: Ensure that your sauna is properly ventilated, especially if you’re using it in an enclosed space. Good ventilation helps keep the air quality safe and breathable.
-
Cooling Down: After your sauna session, it’s important to cool down. A cold shower, swim, or a few minutes in the fresh air can help bring your body temperature back to normal.
7. Maximising Your Sauna Experience
To get the most out of your sauna, consider incorporating a few additional elements:
-
Essential Oils and Aromatherapy: Enhance the atmosphere of your sauna by adding a few drops of essential oils like eucalyptus or lavender to the water you pour over the stones. The steam will carry the soothing aroma throughout the sauna, adding an extra layer of relaxation.
-
Hydrate Before and After: Make sure to drink plenty of water before and after your sauna session to stay hydrated. The heat from the sauna will cause you to sweat, so it’s essential to replenish your fluids.
-
Soothing Music or Nature Sounds: Some people like to listen to relaxing music or nature sounds while in the sauna. A portable speaker can help set the mood and enhance your relaxation.
8. Maintaining Your Portable Woodfired Sauna
To ensure your portable woodfired sauna remains in top condition, here are a few tips for maintenance:
-
Clean the Stove: After each use, clean out any ash from the stove to maintain optimal performance. Ensure the chimney is clear to allow proper ventilation.
-
Check for Damage: Inspect the sauna regularly for any signs of wear or damage. If you notice anything that needs fixing, address it promptly to avoid bigger problems down the track.
-
Protect from the Elements: If you’re leaving the sauna outdoors, consider investing in a weatherproof cover to protect it from rain, wind, and UV damage.
9. The Benefits of Your Own Backyard Sauna
Now that you’ve set up your portable woodfired sauna, it’s time to start reaping the benefits. Not only does it provide a perfect space for relaxation, but it also offers numerous health benefits, including:
-
Improved circulation
-
Enhanced muscle recovery
-
Detoxification through sweating
-
Stress reduction and improved mental clarity
-
Better sleep quality
Having a sauna in your backyard also gives you the flexibility to enjoy regular sauna sessions at your convenience, without the need for spa memberships or long trips to the gym.
Ready to Create Your Perfect Backyard Retreat?
Setting up a portable woodfired sauna is a rewarding project that adds immense value to your lifestyle. Whether you’re looking to relax after a long day, detoxify, or enjoy quality time with friends and family, your new sauna will provide all that and more. For more information on our range of portable woodfired saunas, visit Soulfire Australia and bring the ultimate wellness experience to your backyard today.